Using the Map Fields Dialog
This guide covers the advanced features of the Map Fields dialog
Overview
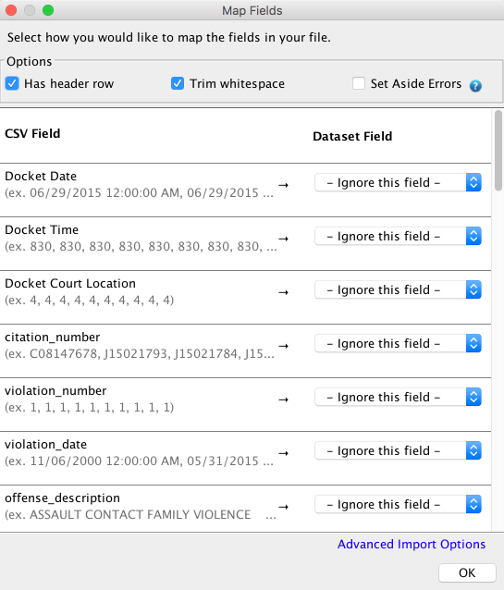
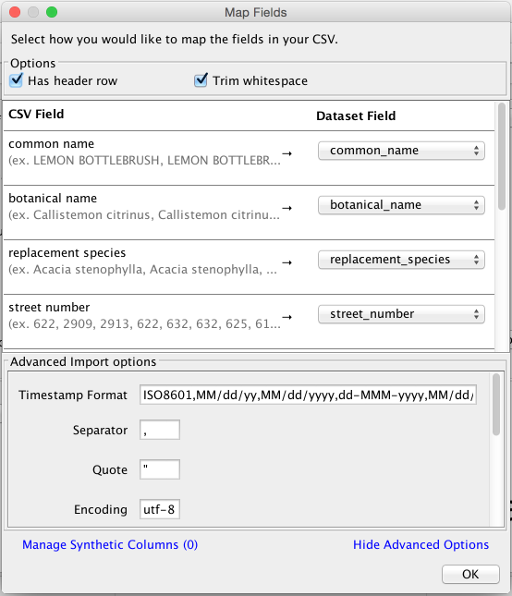
The Map Fields dialog controls how the items in your CSV map to fields in your dataset. By default, DataSync will automatically analyze the shape of your CSV and the associated dataset. Once analyzed, it will attempt to automatically map your fields in the CSV to your fields in the dataset. While most of the times this is sufficient, sometimes DataSync will need a little more information before it’s ready to upload the file. This is where this dialog comes in.
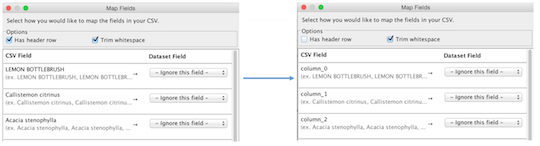
As you change options in the dialog, DataSync will provide immediate, real time feedback around how it views your CSV. For example, toggling the “has header row” option in the UI will immediately reflect the fact that the first row in the CSV will be imported as data, rather than as a header.
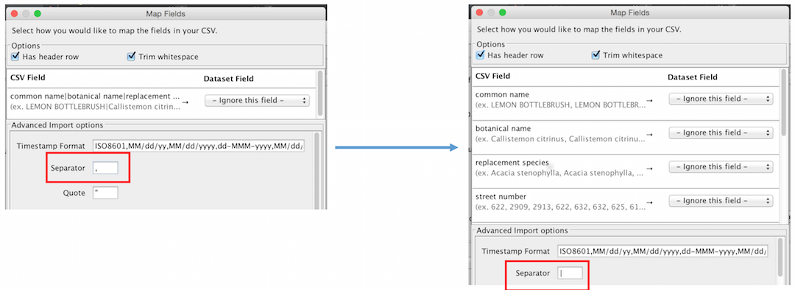
Similarly, changing the “separator” under advanced options will reflect the fact that there are new columns which you can map.
DataSync will also automatically validate that your configuration is correct before the upload takes place. When you click on “OK” DataSync will validate all of the fields and ensure that their values are valid for the given fields. If not, you’ll be presented with an error message that should help you quickly identify and fix the issue:

Once validated, this dialog generates the same control file that you may have used to load data via the command line. Because of this, any saved job can also be run as a scheduled job in headless mode.
While the default settings will typically be sufficient, every once in a while you will need to take additional steps load your CSV. The following sections detail how you can use the more advanced features of this UI to successfully upload your CSV.
###Selecting Set Aside Errors

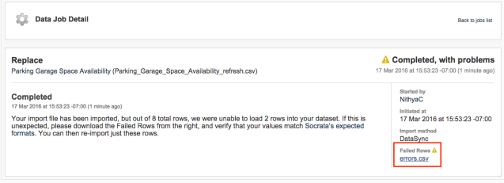
If you’re using DataSync to update your data and you selected “Set Aside Errors” from the user interface (or indicated this in your control file), you’ll see another status - “Completed with Problems”.
For jobs that have “Completed with Problems”, navigating to (yourdomain)/admin/jobs brings you to a page with more information on when the job failed and more descriptive details about the failure. This page will also have a download link for a CSV of the specific rows that failed.
Mapping items in the CSV to fields in the dataset
To map items in the CSV to fields in your dataset, simply click the dropdown and select the dataset field to which the column in the CSV should map.
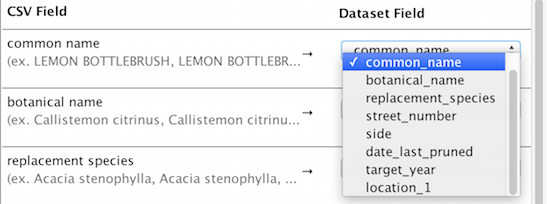
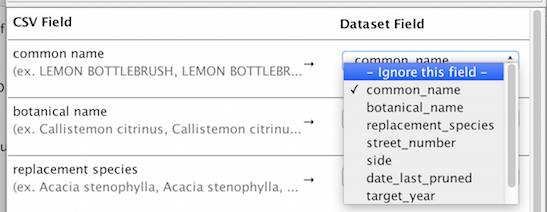
If you don’t want to include this column in the upload, simply select “Ignore this field”
As mentioned above, the UI will show you a preview of your data inline. The top row is your header, while the bottom row is your data.

We recommend checking this prior to upload to ensure that all data is uploaded. Common mistakes include having the “has header row” set when there is no header row in the dataset.
Synthetic locations
When creating a dataset, you can choose to create a location column from components in the original file. For example, you may have a latitude and longitude stored in separate columns that you want to visualize as a single point on a map. To do so, you’ll need to create a single “location” column whose components consist of the values of each of these columns. To map these individual components in DataSync, simply click on the “Add synthetic columns” link in the bottom left to get the synthetic columns dialog:
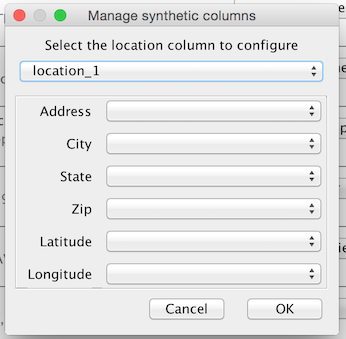
Select the location field in the top dropdown and then map the items in your CSV to the components of your location component.
Once set, you’ll see the following when you click the “Manage Synthetic Columns” link

To manage or remove the column, simply click either the manage or remove link. To add another synthetic location, simply click “add” and follow the above steps
Advanced options
All other options available in the Control File can be found under the Advanced Options panel.
Authoritative documentation on the accepted values can be found in the Control file configuration page